leds version 00.10
| Welcome |
| What is leds |
| Screenshots |
| Contacts |
| leds |
| User Manual |
| Downloads |
| Windows |
|
|
| To do |
| To do |
| Known Problems |
| Links |
| Links |
| Acknowledgments |
Starting up with leds and creating a simple project.
1 fire up leds
leds will automatically create the directories:~/.leds
~/.leds_data
~/.leds_data/projects
2 create a simple project for the D wc example
- click on the"new" icon on the projects view to open the "Project Definition" dialog.
- enter the project name
- select the project Base Dir
- enter the run command for the project "wc " plus your text file name
(in my case I'm using this file you are reading now so it's "wc createproject.txt") - enter "obj" on skip dirs
- press ok (you don't have to press OK now, you can proceed directly to step 2a)
this will create a new project on your project view and
two sub directories on your project base directory:- src
- obj
the obj directory will not be visible as we instructed the project
to skip that directory on the project view.

if you exit and restart leds the project should still be visible
the project informat is stored at ~/.leds_data/projects/wc.lpj
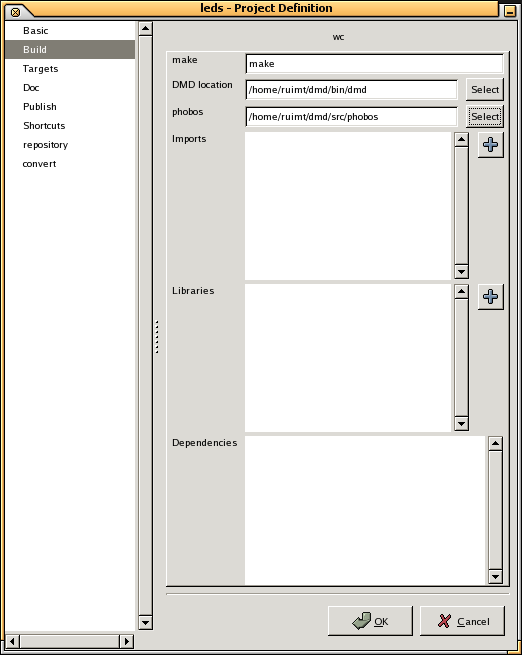
2a create the project build information
(the information entered here is used only to execute one file sintax checking)- rigth click on the project and select properties
- select the Build panel
- select the dmd location
- select the phobos source location
- press OK
3 add the wc source to the project
- copy the wc source code into the Untitled source buffer
- save the source code into the src directory of the project,br> (for source files with a module definition just select the project and
press the "add to project" button on the main toolbar to save the file
onto the correct place) - rigth click on the project name and select resfresh. You should now see the file under the src directory
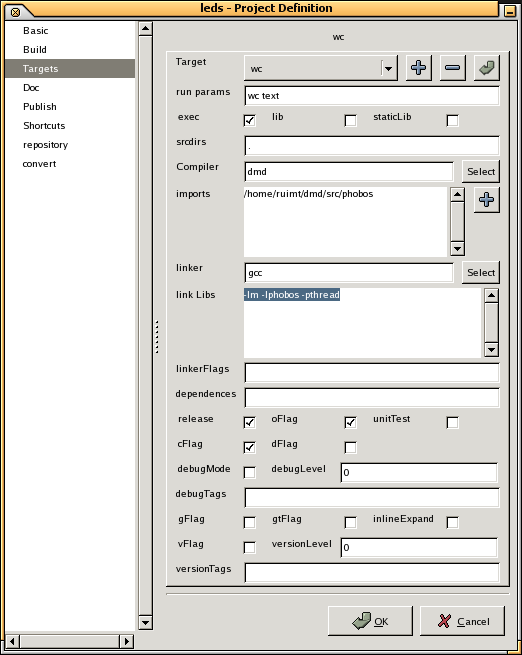
4 targets
- right click on the project and select properties agina
- select the Targets panel
- press the plus button to add a new target
- enter the run params "wc text"
- enter te srcdirs "." (a dot for default package)
- enter dmd on the compiler
- add the phobos source location on the imports
- enter "gcc" on the linker
- enter "-lm -lphobos -pthread" on the link libs
- PRESS THE TOP RIGHT MOST BUTTON
- press OK
5 compiling your project targets
- select the project on the project view
- rigth click the build tool on the main toolbar and select your target
this will compile the wc example programthe message on the new console should be something likeExecuting: cd src; dmd ./wc.d -I/home/ruimt/dmd/src/phobos:/home/ruimt/dmd/src/phobos -c -O -od../obj -op
Finished: cd src; dmd ./wc.d -I/home/ruimt/dmd/src/phobos:/home/ruimt/dmd/src/phobos -c -O -od../obj -op 2>&1
Executing: gcc obj/./*.o -o wc -lm -lphobos -pthread
Finished: gcc obj/./*.o -o wc -lm -lphobos -pthread 2>&16 run your project
- select you project (should still be selected)
- left click on the execute tool on the main toolbar
this will execute the command defined on the step 2. run command. A new console is opened and I can see:Executing: cd /home/ruimt/devel/D/WC ; wc createproject.txt 83 526 2993 createproject.txt
Finished: cd /home/ruimt/devel/D/WC ; wc createproject.txt 2>&16a run any of your project targets
- Warning:
- there is a bug on the targets that prevents the targets to be run with any paremeters
- (DON'T) rigth click the execute tool on the main toolbar
TWO BUGS concurr to freeze leds:- the target definition lost the parameter passed to the execute command
(so it becomes "wc" instead of "wc createpreject.txt") - the wc example never finishes if no file name is passed in.
- the target definition lost the parameter passed to the execute command
- (DON'T) rigth click the execute tool on the main toolbar